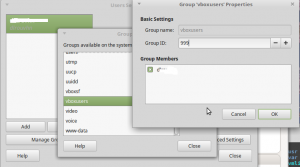
Then you probably need to logout and login to refresh the groups.


It should look like this:


StepIT – Home
Then you probably need to logout and login to refresh the groups.
It should look like this:
Now just Extract the system.vhd to a folder on the PC. Go then to Oracle Virtual Box, select new VM

Make sure you select Use Existing Virtual Hard Disk and browse to the system.vhd.
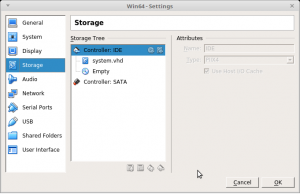
Click on the Create VM. After that BEFORE YOU RUN IT, go to settings and ADD an IDE controller.
After that add the system.vhd to the IDE controller and remove it from the SATA Controller.
it should look like:
Save and start the VM,it should work fine.
Here is my steps to get fetchmail to stop complaining about SSL certificates.
You Might get an error like :
fetchmail: Server certificate verification error: unable to get local

issuer certificate

fetchmail: This means that the root signing certificate (issued for

/C=GB/ST=Greater Manchester/L=Salford/O=COMODO CA Limited/CN=COMODO RSA

Certification Authority) is not in the trusted CA certificate locations,

or that c_rehash needs to be run on the certificate directory. For

details, please see the documentation of --sslcertpath and --sslcertfile

in the manual page.
I run my fetchmail like :
/usr/bin/fetchmail --ssl --sslcertck --sslcertpath=/etc/fetchmail/cert -a -K -f /etc/fetchmailrc
You need to get the server’s certificate and the CA certificate under /etc/fetchmail/cert
openssl s_client -connect server.yourdomain.com:993
look for Certificate chain
0 s:/OU=Domain Control Validated/OU=PositiveSSL/CN=server.yourdomain.com
and copy the section —–BEGIN CERTIFICATE—–
….
—–END CERTIFICATE—–
including the —–BEGIN CERTIFICATE—– and —–END CERTIFICATE—– sections to a file.
If you dont know how to do it what I normally do is highlight it in a terminal then in another terminal I do a :
cd /etc/fetchmail/cert

vi your.server.com.pem
and hit ESC I (vi insert command) right click with my mouse to paste and then ESC :wq (vi write & quit command)
Now all you need is the CA Cert. Have a look in the output of the openssl command and look for issuer. I had to download it form their site. If it was a legitimate issuer you might not need to do this part.
Now you need to do a
cd /etc/fetchmail/

c_rehash cert
to rehash the certificates.
To get your linux pc to work with Netflix / Showmax follow this link: http://www.stepit.co.za/wp/blog/2019/01/25/getting-netflix-or-showmax-to-work-on-linux/
If you have an old PC converting it to Linux for a media player at home is great fun and I will let you know how I did mine. You can also watch Netflix or Showmax directly on your TV in Full HD.
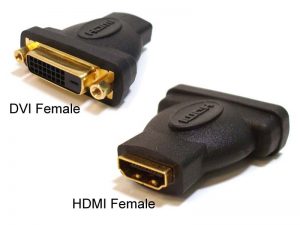
DVI Port looks like:

If its DVI you would need a converter adapter to convert from DVI Male to HDMI Female. Look Like: (Picture is wrong its a DVI female you would need DVI male)
The only issue is that it will not have sound and you would require a separate audio cable for that. Maybe Stereo to RCA.
Look like:

Now all you need is to download a Linux CD try Mint from Linux Mint.
For ShowMax to work you would need to download and install Google Chrome. Not Chromium and not Firefox. And you should download the Latest Ubuntu flavor from : Chrome
Now for your own Media MP3’s and MP4’s you have I suggest following the Kodi TV Addons instructions.
Enjoy!!!!